Chocolate-Covered Pretzel Nests: A Fun and Festive Easter Treat
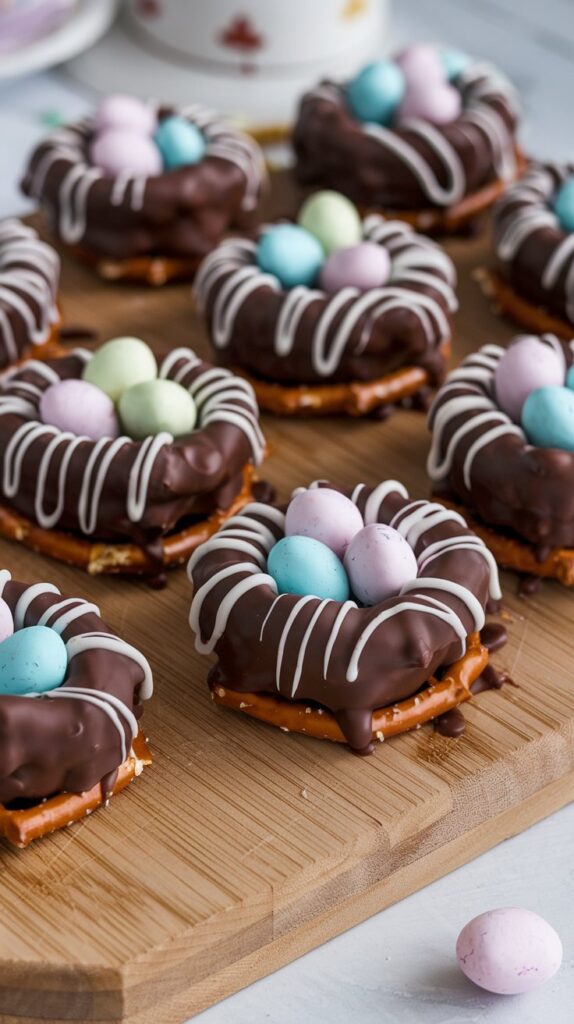
Chocolate-Covered Pretzel Nests are a whimsical, festive treat that’s easy to make and perfect for Easter or any spring celebration. With their balance of sweet and salty flavors, crunchy texture, and charming appearance, they’re sure to bring smiles to everyone who sees (and tastes) them.
With their whimsical appearance and easy-to-make recipe, chocolate-covered pretzel nests are sure to be a hit at any Easter gathering.
Made with just a few simple ingredients — pretzels, melted chocolate, and colorful mini eggs — these nests are a fun, no-bake treat that you can whip up in no time.
In this article, we’ll walk you through the process of making Chocolate-Covered Pretzel Nests, along with tips to customize them to your liking and ideas to make them even more festive.
Why You’ll Love These Chocolate-Covered Pretzel Nests
🍫 Sweet and Salty Perfection
The combination of sweet, creamy chocolate and salty pretzels creates a perfect balance of flavors. The crunch from the pretzels adds a satisfying texture, while the chocolate brings a rich, decadent taste.
🐰 Adorable and Festive
These nests are as cute as they are delicious! They mimic the look of little bird’s nests, making them a perfect addition to your Easter or springtime celebrations.
🥣 Quick and Easy to Make
This is a no-bake recipe that requires minimal effort and time. It’s a great project to do with kids, as it’s simple, fun, and doesn’t involve any complicated techniques.
🎨 Customizable
You can customize your pretzel nests with different types of chocolate (milk, dark, or white) and fill them with your favorite candies or edible decorations. The possibilities are endless!
Ingredients
To make these delightful Easter treats, you’ll need the following ingredients:
- Pretzel sticks (about 4 cups)
- Milk chocolate chips (or dark/white chocolate)
- Mini candy eggs (such as Cadbury mini eggs or jellybeans)
- Shredded coconut (optional, for a “nest” effect)
- Sprinkles (optional, for added decoration)
Step-by-Step Instructions
1️⃣ Melt the Chocolate
Start by melting the chocolate in a heatproof bowl. You can do this by microwaving the chocolate chips in 20-second intervals, stirring in between, until the chocolate is smooth and fully melted. Alternatively, you can use a double boiler to melt the chocolate over low heat.
2️⃣ Coat the Pretzels
Once the chocolate is melted, add the pretzel sticks to the bowl. Gently toss the pretzels in the melted chocolate until they are fully coated. Make sure each pretzel is covered with a generous amount of chocolate to help hold the nests together.
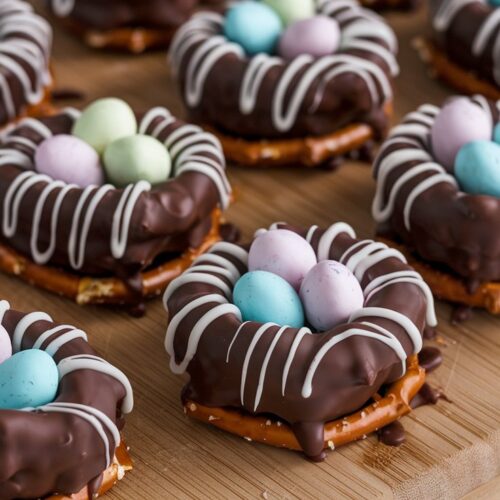
3️⃣ Form the Nests
Line a baking sheet with parchment paper or a silicone baking mat. Take small handfuls of the chocolate-coated pretzels and arrange them into nest shapes on the baking sheet. Use your hands or a spoon to shape them into round, nest-like structures with a small indent in the center.
4️⃣ Add the Mini Eggs
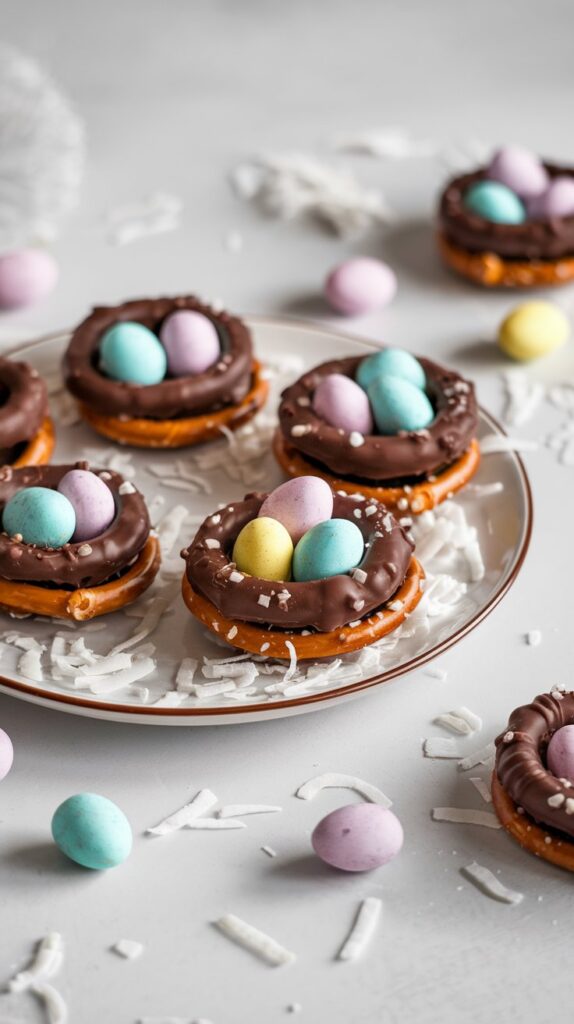
Before the chocolate sets, place a few mini candy eggs in the center of each nest. You can also sprinkle some shredded coconut around the edges of the nests for a more realistic “bird’s nest” effect. Add sprinkles or other decorative elements if desired.
5️⃣ Let the Nests Set
Place the baking sheet in the refrigerator for about 20-30 minutes, or until the chocolate has hardened. Once the nests are firm, they’re ready to serve and enjoy!
Tips to Customize Your Chocolate-Covered Pretzel Nests
🌈 Use Different Chocolates
Try making a variety of nests using different types of chocolate, such as milk, dark, or white chocolate. You can even add food coloring to melted white chocolate to create colorful nests.
🍬 Choose Your Favorite Fillings
While mini candy eggs are a classic choice, you can get creative with the fillings. Try using jellybeans, pastel M&Ms, or even small chocolate truffles.
🥥 Add Shredded Coconut
For a more authentic “nest” look, toss some shredded coconut in the melted chocolate along with the pretzels. The coconut will give the nests a more rustic appearance.
🌸 Decorate with Edible Flowers
For a more elegant presentation, top your nests with edible flowers or decorative sprinkles. This is a great way to make them look extra special for a springtime party.
Why These Nests Are Perfect for Easter and Beyond
Chocolate-covered pretzel nests are not only delicious but also versatile. They make for a fun, festive addition to your Easter dessert table, a unique edible gift, or a sweet treat to make with your kids during the spring season.
Here’s why they’re perfect for different occasions:
- Easter Parties: Their adorable nest shape and bright pastel colors make them a hit at Easter parties.
- Gifting: Package the nests in clear cellophane bags tied with a ribbon for a thoughtful homemade gift.
- Kid-Friendly Treat: Kids love making and eating these fun treats. It’s a great way to get them involved in the kitchen.
- Spring Celebrations: These nests are not limited to Easter. They’re a delightful addition to any springtime gathering.
Storage Tips
If you have leftovers (which is rare because they’re so delicious!), store the nests in an airtight container at room temperature for up to a week. You can also refrigerate them if your kitchen is warm.
Chocolate-Covered Pretzel Nests
Ingredients
- 4 cups pretzel sticks
- 1 ½ cups milk chocolate chips or dark/white chocolate
- 1 cup mini candy eggs such as Cadbury eggs or jellybeans
- ½ cup shredded coconut optional, for a nest effect
- Sprinkles optional, for decoration
Instructions
- 1️⃣ Melt the chocolate: In a microwave-safe bowl, heat chocolate chips in 20-second intervals, stirring between each, until fully melted.
- 2️⃣ Coat the pretzels: Add pretzel sticks to the melted chocolate and toss to coat evenly.
- 3️⃣ Form the nests: On a lined baking sheet, take small handfuls of coated pretzels and shape them into nest-like circles.
- 4️⃣ Add eggs and toppings: Place mini candy eggs in the center of each nest. Sprinkle with shredded coconut or sprinkles if desired.
- 5️⃣ Chill and set: Refrigerate for 20-30 minutes until the chocolate hardens. Serve and enjoy!